Make your own TAGS with the 3-in-1 Bevel Tag Punch!
Save TIME, MONEY and STRESS by making your own tags with this 3-in-1 Bevel Tag Punch! Most of my life is running at the last minute putting something together…how about you? Having the right tools makes a huge difference in keeping things calm. I really need that in my life. Creative Memories is known for their quality tools and I wish they would keep a tagmaker in stock year ‘round. But they pop in and out of stock like their other tools, so if you want one, you need to get it while they have it. You can find this particular one here. It punches perfect tags for gifts, or be used in any papercrafting. Is there anything as satisfying as a perfect punch? I think not!

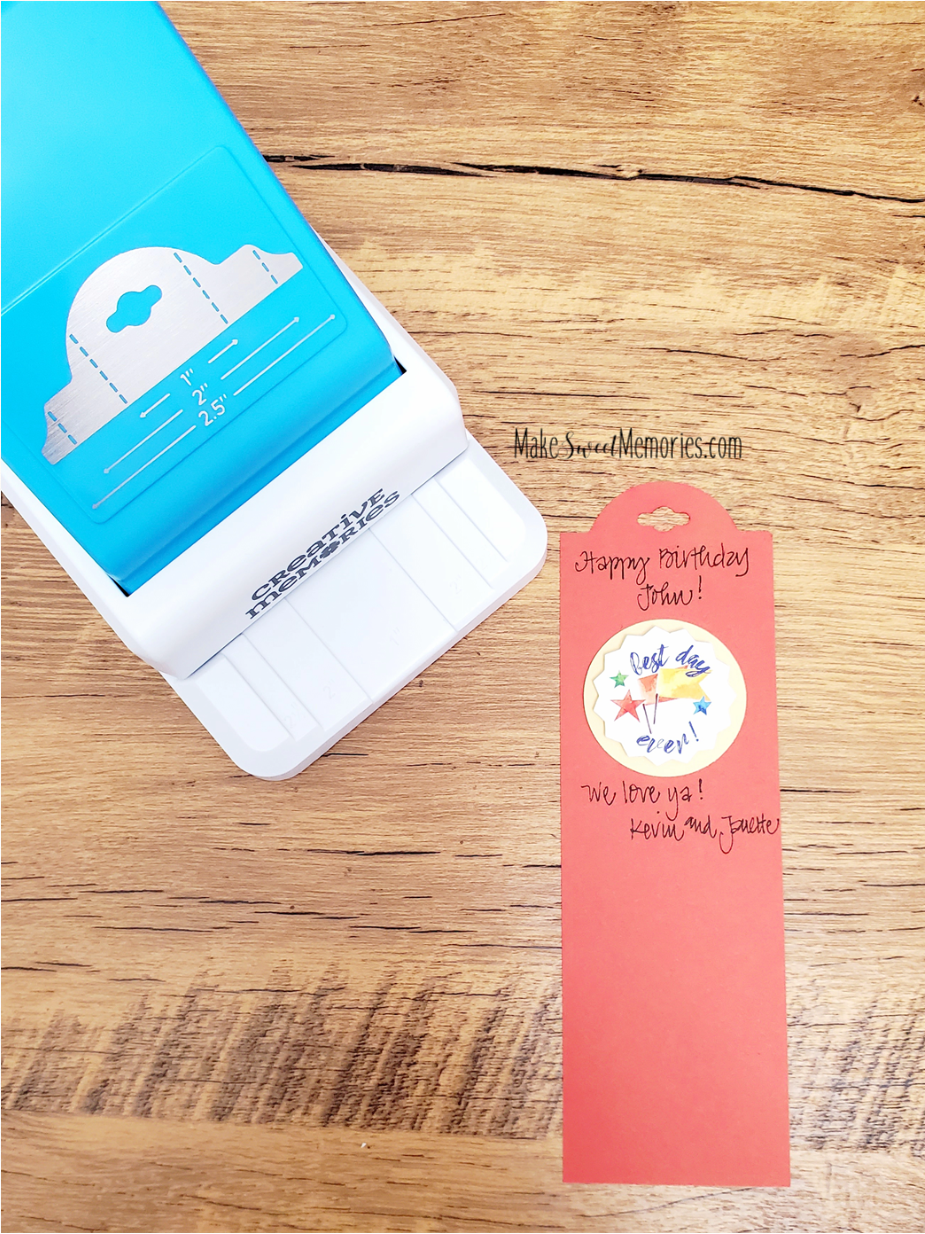
This past weekend, I needed to put together a quick bag of treats and went to my tagmaker to put on the finishing touches. I found a red piece of scrap cardstock in my stash and inserted it in the tagmaker and punched. You can see it will punch strips of paper at 1”, 2” and 2.5” wide. I slipped in a piece of red paper that was 2 inches wide and it fits right in the grooves of the punch, so you know it will punch correctly. I wrote on the top of it and added a sticker on foam squares to give it some dimension. Then I signed our names BEFORE I trimmed off the bottom with my personal trimmer so I knew there was enough room.

Add a little ribbon and your cute tag and it looks festive, but only took a few seconds! Less expensive than a card and I am using WHAT I HAVE of my own paper and stickers. LOVE it!
Would you like to make a little “pocket” to slip in a gift card for someone? Gift Card Holders feel like its a little more special!

These are fun and just take a minute to make up, USING WHAT YOU ALREADY HAVE on hand! Here are some ideas using the DENIM paper pack, Croptoberfest 2021 Customer Bundle and the Homestead Paper pack- some of my favorite collections! I learned this technique on the Creative Memories blog, originally created by Krislyn Mattei.
Directions for making your own “Gift Card holder”:
DIY Gift Card Holder:
Cut a 5-1/2” x 4-1/2” piece of designer paper. With the 12-inch Trimmer and the Scoring Blade, score the long side at 1/2″ and at 3″.
Fold the paper to a 2-1/2″ width and punch the top.
Open it up and place the middle of the tag punched edge and the 1/2″ edge at an angle on the cutting mat of the trimmer. Cut, leaving you with just the left-most edge with a tag punched edge.
Run adhesive along the bottom and fold the piece up again. Run adhesive along the 1/2″ edge and fold around the back.
Adhere gift card to the card.
Cut a 4-1/2″ section of a border sticker and adhere to the card OR add any additional stickers and embellishments you choose.
