How to make a Classic Scrapbook page!
Lets start with my pile of photos! I have 15 photos here from a trip and I want to create a two page layout with them. How do I arrange and decorate a scrapbook page so it is classic but interesting?
I want my photos to be the focal point, I want to include my story, and I have a lot of photos to use! I like to add in color and some embellishing to make my page engaging and enjoyable to look at.
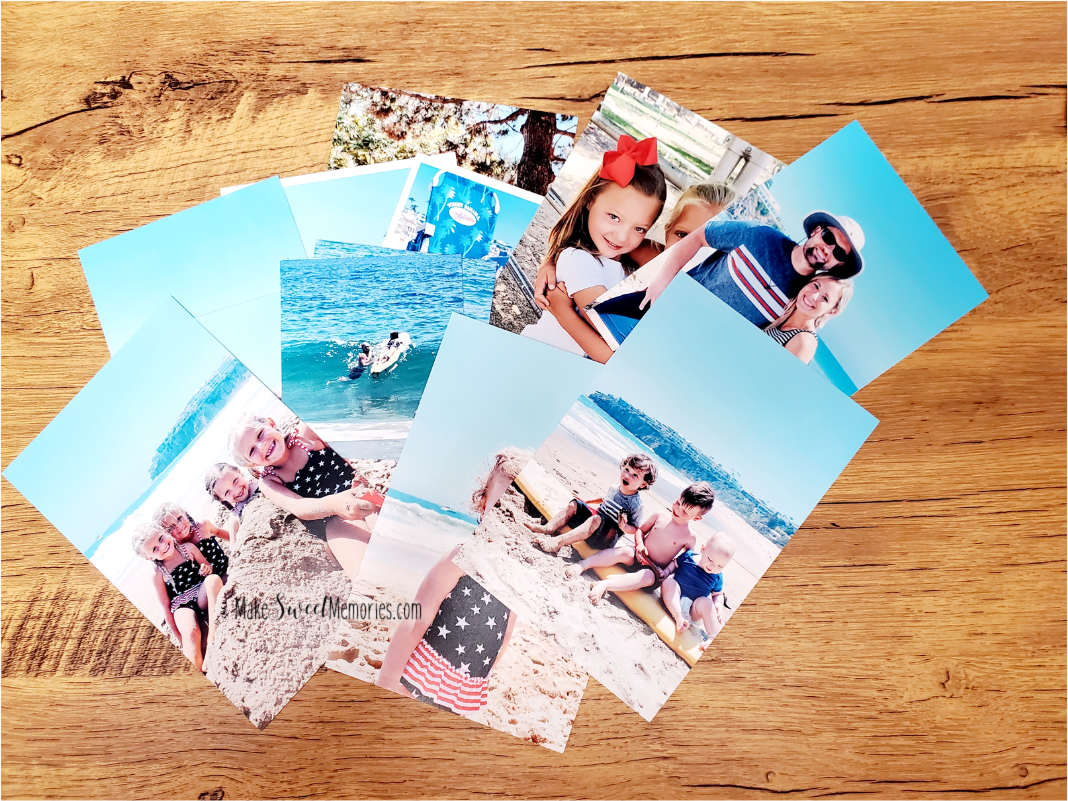
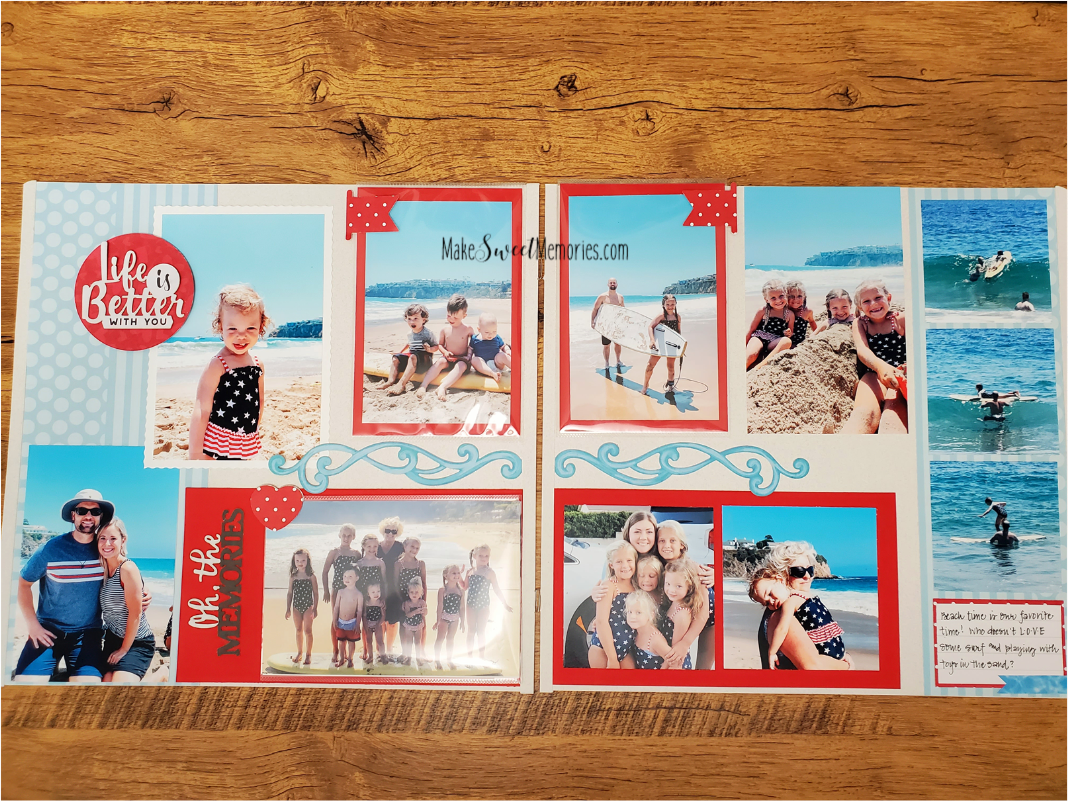
First I look for the dominate colors in my photos- which for this stack of photos are red, navy and blue. I want to accent the photos with some color, but not compete with or overpower them. My photos are always the heart of my page! It is what I want people to see first when they look at my scrapbooks. I like to add in blocks of paper to add color quickly. (If you have not read my blogpost on my 3 Favorite Scrapbook techniques, check that out here.) I have a few photos of my granddaughter trying to surf in the ocean and she is far away. I can crop those down, to take up less space on my page. These three smaller photos tell their own story. It’s fun to use a sequence of three photos!
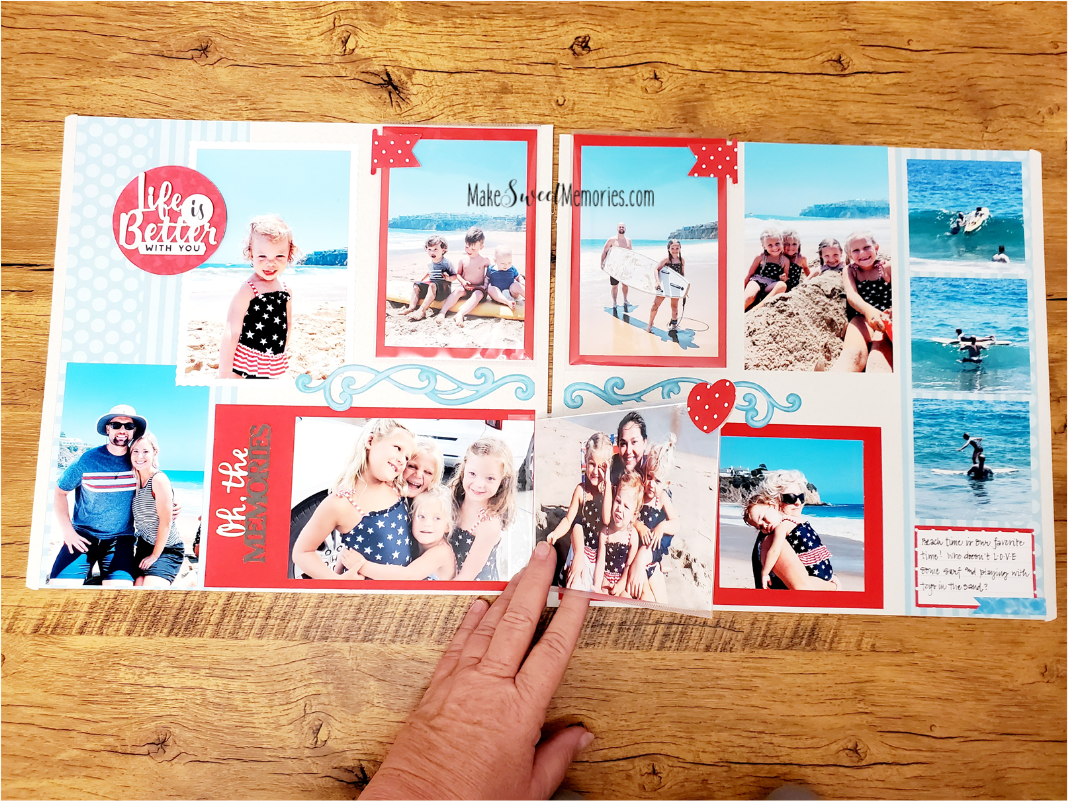
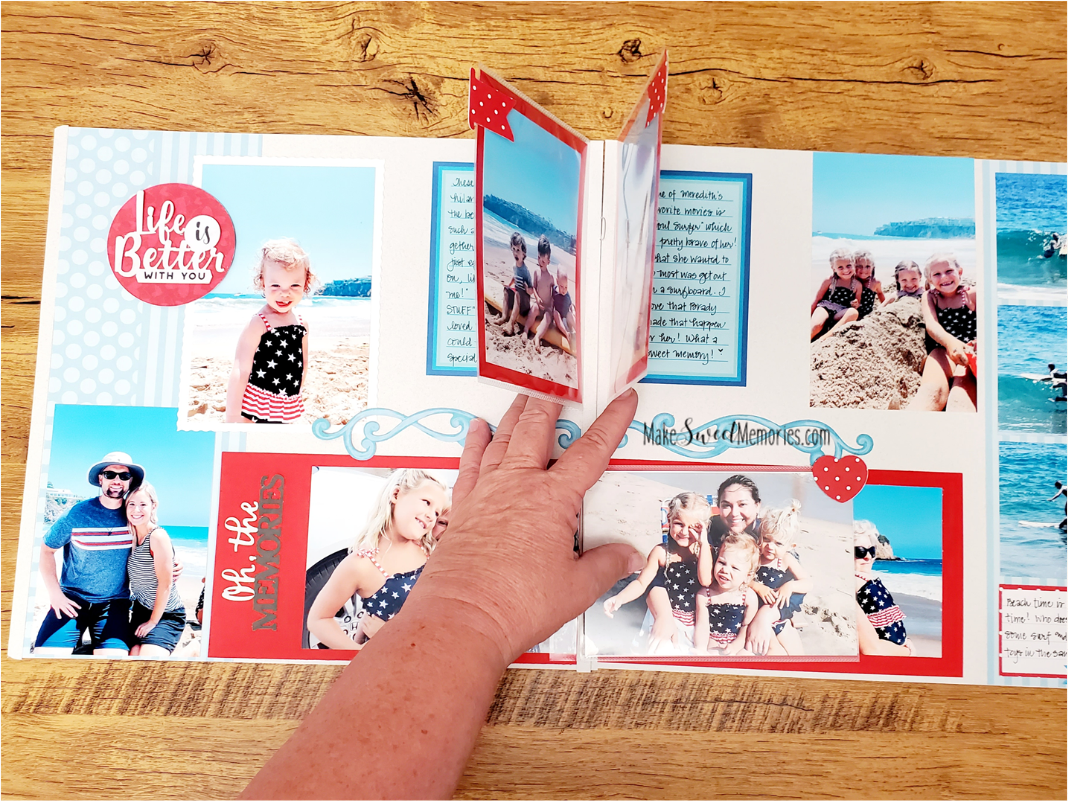
I look for photos that I want to emphasize and decide which could be layered underneath, using peekaboo pockets. Peekaboo Pockets save so much space! (If you have not seen what peekaboo pockets can do, watch my Facebook LIVE showing peekaboo pockets by clicking on the Facebook icon at the top of the page, then clicking on VIDEOS.) They are clear plastic sleeves that are safe for photos with adhesive on one side that is used to adhere to your scrapbook page. They help you layer photos so you can fit more of them on your page.
Adding design: I used a few blocks of red cardstock that were about 4.5” x 8” long to fill in space as I moved my photos around to see what I liked. The color makes it pop! I slipped in a few into the peekaboo pockets on the side of my lefthand page, close to the inside jeeping. I did this, so I can layer the top part of it over my page protector. Can you see how the block of red fills the space on both sides evenly, even though the right page has two 4x4 inch photos on it? It is visually balanced. I cut a strip of 4.5 x 12” blue paper on the left side and a slightly smaller one on the right side of my layout. They don’t need to be exactly the same size! This size will allow for a nice size mat around my far lefthand side vertical photo. Adding in that block of color is MUCH faster than matting each individual photo. I added a small journaling box on the right side and matted it with some red polka dot paper and will do more journaling on the underside of my peekaboo pockets. Its nice to have that option to keep some of your journaling private.
I can add a “tag” to the top photo, to invite people to take a look at what is underneath! You can do this with any punch and coordinating paper, or use 2 stickers of the same size and pop them onto the top of the pocket and the back so they line up perfectly. I used my heart punch here with some coordinating polka dot paper. This is a really fun interactive element! Try it! You can order your peekaboo pockets here. Just put “peekaboo pockets” in the search bar. They come in 4x6, 5x7 and 6x12 sizes! You can see how this is taking shape!
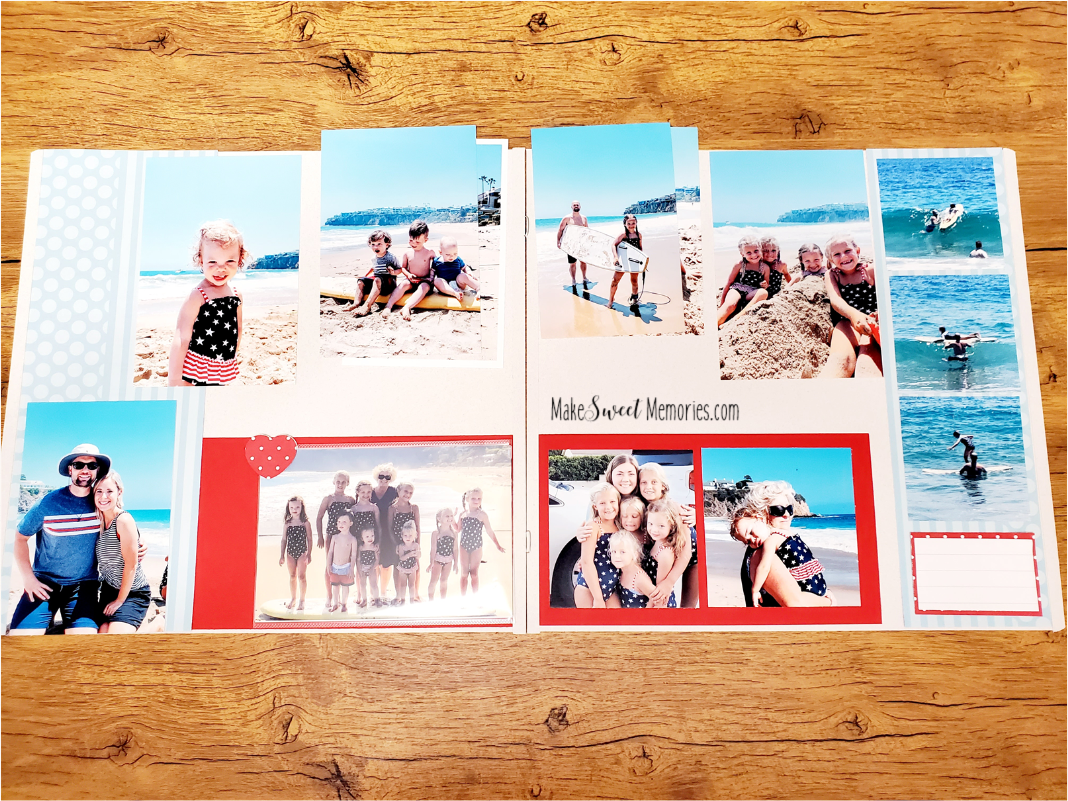
Now, what about a few more embellishments? Maybe mat a photo with a laser cut mat, (the Sparks of Magic laser mats would be a great choice!) or just some white paper. I used the WAVE blade with my Creative Memories 12 inch trimmer and white cardstock to make this photo stand out. You can pop in something along the middle to bring the two sides together. I love using laser cut embellishments and titles! They are fast and make your page look so good! The two titles I used were from the MUST HAVE LASER TITLE Embellishment pack #2. You can get that here! The blue paper comes from the “Sparks of Magic” Tone on Tone Paper pack. It works for Disney and it works for the beach! Think outside the box!
The swirly blue laser border comes from the Summertime Laser Border pack and it matches the blue paper perfectly! I just cut it in half to fit across the page. This page does NOT look crowded, even though there are 15 photos being used. I wanted all of them! My story can be filled in on the under side of a peekaboo pocket- there are still two more pockets at the top of the page. I will finish it off and add in a few tabs and we are done! Simply, but beautifully done! You can buy any of these products here.

All of these products were purchased from Creative Memories. Their 12 inch trimmer with decorative blades is the best trimmer I have ever used, it cuts like butter! You can purchase additional straight or decorative blades so it will last you a very long time. I used the TAG PUNCH from Creative Memories that I purchased last year on the top two peekaboo pockets so people would touch and see what is underneath. What punches do you have that could work for you? Your page does not have to look exactly like this one, but punches are a great speed tool and Creative Memories has a variety of options, with new tools being added every month.
If you are just starting to scrapbook or want to define your own style, take a look at my blogpost about 10 Steps to completing a Scrapbook right here. I am pleased with how this 2 page spread turned out and it was quick to complete. I have a large family and a lot of photos I am dealing with. I decided a long time ago, a classic approach worked best for me. Knowing YOUR OWN style is so important! After 30 years of scrapbooking, I know what I like. Everyone has a different style and it doesn’t have to be just like mine - just know what yours is! If you use this layout yourself, I would love to see what you do with it! Post your 2 page spread on my Facebook page. We love to share ideas to inspire each other! Just click on the Facebook icon above and you are there!